
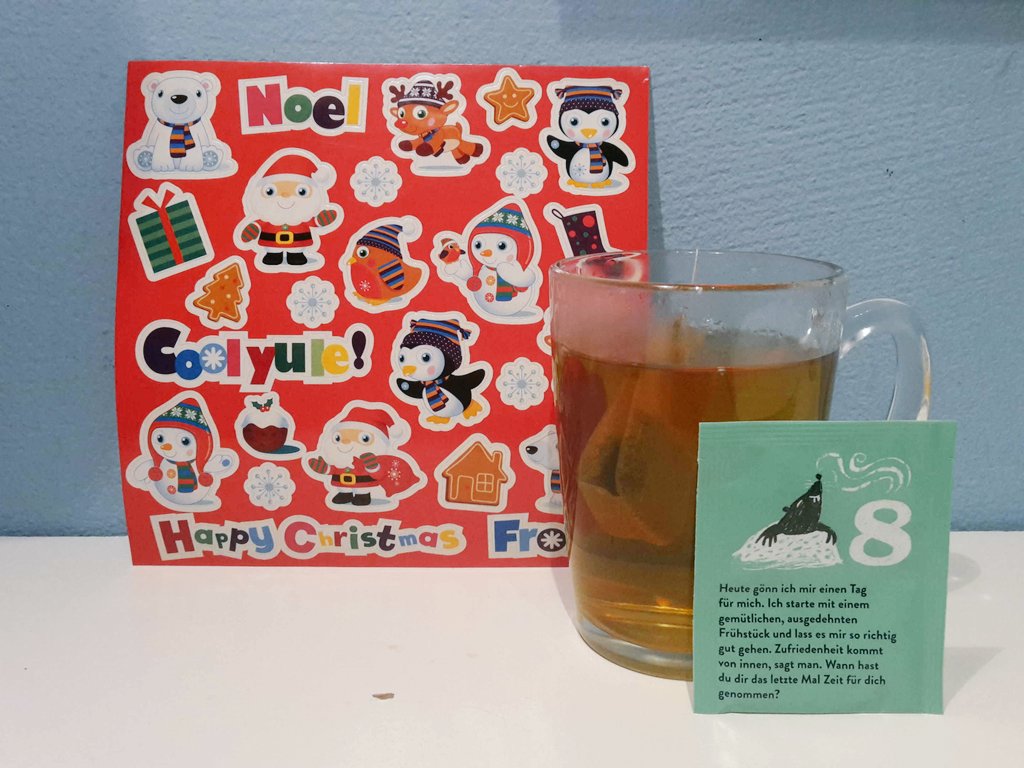
My eight day of cheer were: Christmas stickers! Perfect for decorating the envelopes of the Christmas post cards I will be sending out this week. It’s funny, because I was just thinking about it that I needed something like this!
Yesterday’s tea was a “Good Morning” tea, filled with blackberry leaves, peppermint, strawberry leaves, calendula and cornflower. The smell is earthy combined with peppermint and the color is a dark yellow from the calendula. The taste is actually very minty. A bit too much for me. Luckily I can combine it with breakfast because mint tea always makes me hungry!
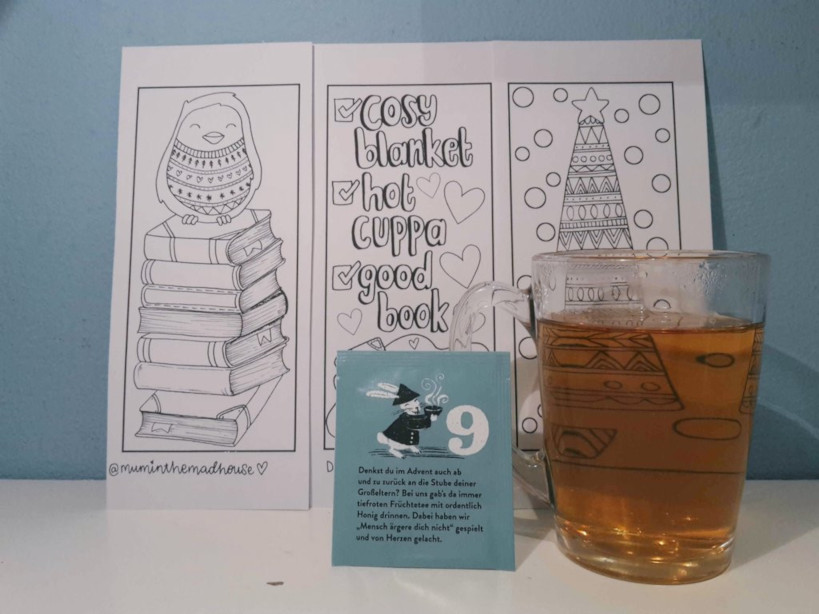
And today, my nineth day of cheer, are: three cute bookish colouring pictures! Which will be a very relaxing thing to do and I’m already looking forward to it. Just look at that owl with his Christmas sweater! That tree is also pretty amazing. I’m already curious at how it will turn out.
Today’s tea is a “Pai Mu Tan” tea, a white tea. Suddenly something completely different! I’m not very familiair with white teas, so I like the surprise. It smells well, like tea leaves, and funnily enough the color is a sort of slight pink-brown. The taste is a surprise too. I expected a dark taste, but it is a bit sweet, like from flowers. Very nice!
![]()
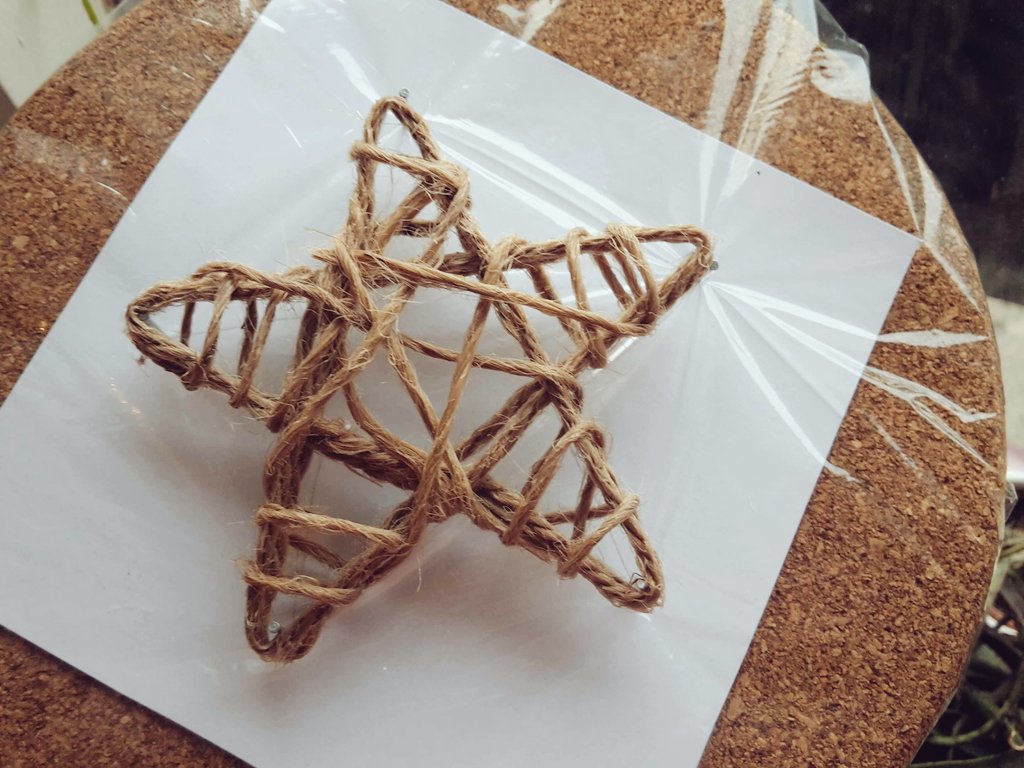
Today’s craft is a real easy but also a bit of a messy one. I didn’t think of this myself, I just randomly found it at Youtube (Youtube is good for me these months, I only get Christmas craft, post cards or journal recommendations, ha!)
All you need for this craft are:
- a white but clear drying glue
- jute twine (in whatever color you want)
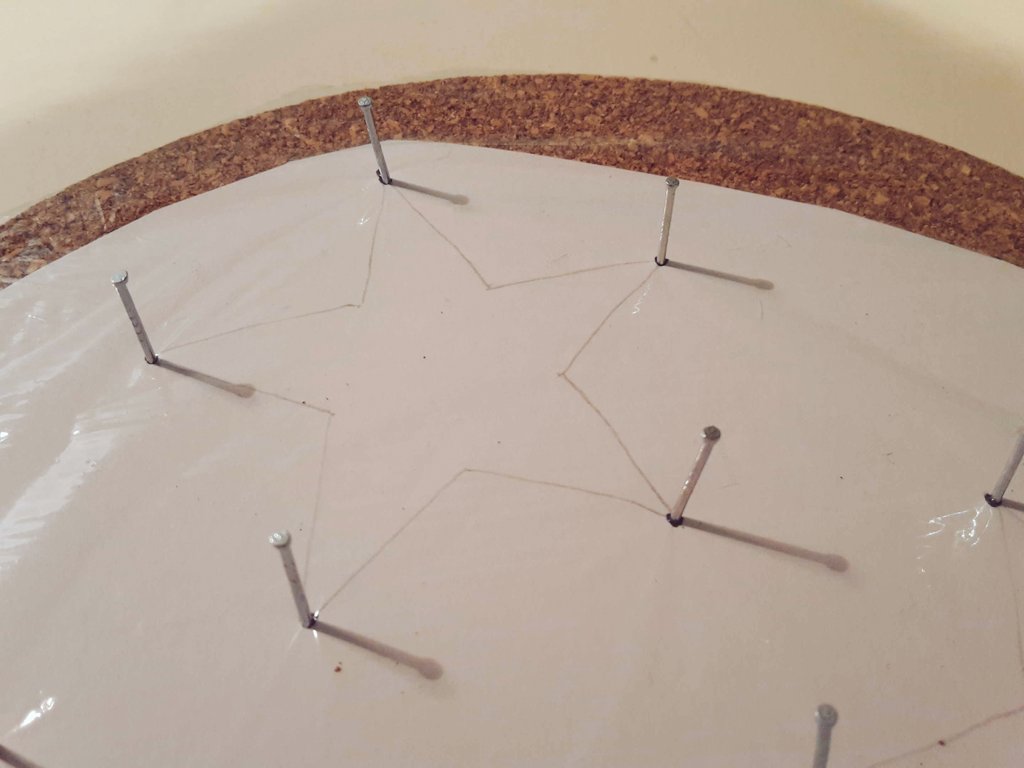
- a cork board
- your star template
- 5 pins (one for every corner of your star)
- cling wrap
- a trow-away bowl
- some gloves, if you don’t like to get your hands sticky!
And for additional decoration:
- paint
- glitter
- other things you want to glue to your star
So how to make these DIY string star ornaments?
Draw out or print your star template (you can totally cheat, I drew mine from my laptop screen as I don’t own a printer), lay it on the cork board and wrap it with the cling wrap. Put your pins on the corners of the stars.
Measure out the amount of twine you need and cut it to size. Mix your glue with some water. Put in your twine and toss it around a bit until it’s soaked and covered in glue.
Make sure it’s not too drippy and start folding your twine around the pins, to get a pentagram-shape. Let it all completely dry. Except for your desk and whatever else you made a mess of with the glue. :-p
After drying, when it’s fully hardened out, you can remove the pins and take your stars of the cling wrap. If it’s not fully hardened out, brush it with some more of the water-glue fixture.
Again, put twine in the water-glue fixture and wrap it around your star. And again, let it dry out completely. After drying you can further decorate it. Or just leave it as it is.
I only made a couple of small ornamental stars, but I also want to make a big one for the window. What about you? Are you going to make these string stars? Or maybe some of last years DIY toad stool ornaments? Or do you have any other crafts planned? Tell me about it in the comments!
Pingback: 12 days of blogmas 2020: introduction – Spiderwebz
Pingback: 12 days of blogmas 2020: hot chocolate winter date – Spiderwebz